Connect to Microsoft 365 or Outlook online accounts with mondern authentication (OAuth2)
POPcon supports OAuth authentication for Microsoft Office 365 or Outlook online IMAP accounts. Note that Microsoft only supports OAuth for IMAP accounts, and POP3 OAuth is not available. Follow the steps below to set up a Microsoft Office 365 or Outlook online IMAP account using OAuth in POPcon.
Step 1: Configuring the Email Account
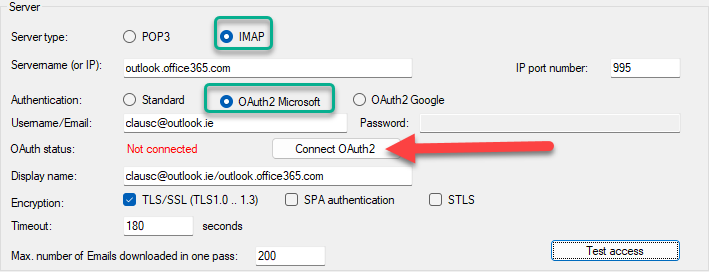
Open POPcon and navigate to the "Email account details" screen. Select IMAP as the server type and enter the server name outlook.office365.com. Make sure to choose the OAuth2 Microsoft option for authentication.
Note: The IP port number for Microsoft IMAP with OAuth is 993, as shown below.
Step 2: OAuth Authentication
Click on the Connect OAuth2 button to start the OAuth authentication process. A web browser window will open, asking you to sign in with your Microsoft account.

Step 3: Microsoft Account Sign-In
Microsoft will prompt you to verify your identity. You will receive a notification to your phone or other authentication methods to sign in securely. Verify your identity to proceed.
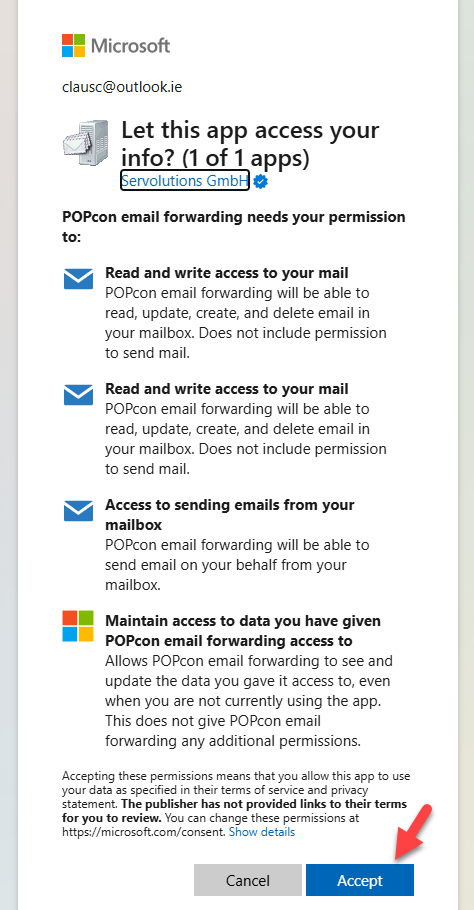
Step 4: Grant POPcon Email Forwarding Permissions
Microsoft will ask for permission to allow POPcon email forwarding to read, update, create, and delete emails from your Outlook account. Review the permissions and click Accept to grant access.
![]()
Step 5: Successful Authentication
After authentication is complete, you will see a confirmation message saying "Authentication successful." You can close the browser window and return to POPcon.
Step 6: Completing the POPcon Configuration
After authentication, the status in POPcon will show as Authenticated. You can now test the email account connection by clicking on the Test access button to ensure that everything is configured correctly.

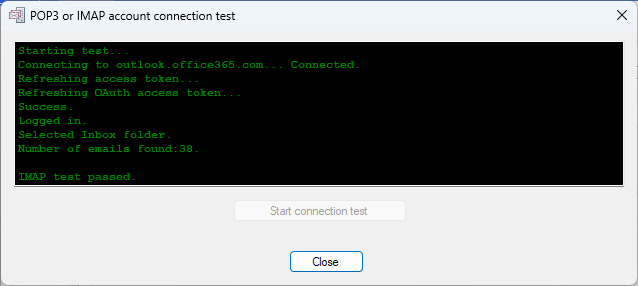
Step 7: Connection Test
POPcon will test the connection to your Microsoft Office 365 or Outlook online account. If the test passes successfully, you are all set to retrieve emails using OAuth authentication.
If you encounter any issues during the process, make sure that you have followed the steps correctly and granted all necessary permissions. For further assistance, please contact our support team.